Module Suite installation guide: Deploy Modules on Windows
Overview
This guide covers the Deployment phase that is part of the Module Suite installation guide.
- Deployment
- Installation
- Activation
- Configuration
- Post-installation patching
This phase covers the deployment of the software binaries on the target system. The related operations will be performed with a click-through installer.
We will refer to the Content Server main installation directory as %OTCS_HOME% .
Platform specific
This guide is specific to the installation steps for a Windows environment. If you are installing on a Unix/Linux environment, please refer to Deploy on Unix/Linux.
Installers
The guide assumes that the required Module Suite installers for Windows have been provisioned and copied on the file system of the target environment.
Step-by-step Deployment
In order to deploy the Module Suite components, please follow these steps:
-
Stop the Content Server services
-
Run the Module Suite Master Installer
At this time, we will be installing the core Module Suite Content Server modules (Content Script, Beautiful WebForms, Smart Pages) and all the desired Module Suite Extension packages.
The following screens will guide you through the deployment of Module Suite modules.
-
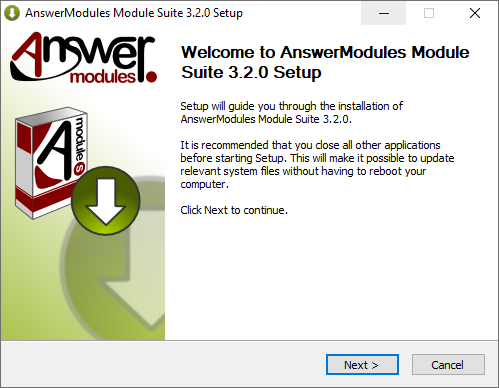
Welcome screen:
Select “Next” when ready to start the installation.
-
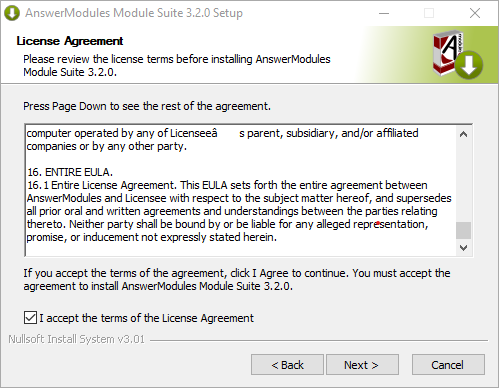
Accept Module Suite EULA:
Acceptance of the end-user license agreement is mandatory for proceeding with the installation.
Accepted agreement
A copy of the EULA agreement will be available, upon installation, in:
%OTCS_HOME%/module/amcontentscript_X_Y_Z/license/EULA
Select “Next” when ready.
-
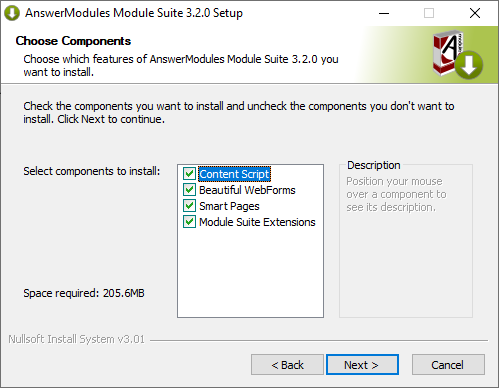
Select the components to be installed:
Select the components to install.
Partial installation
If you are intending to install only a subset of components, uncheck the elements that are not required from the list.
Dependencies
The following components:
- Beautiful WebForms
- Smart Pages
- Module Suite Extensions
depend on the "Content Script" module.
If you are intending to perform a partial installation, please make sure that "Content Script" is either selected or has already been installed in the system.
Select “Next” when ready.
-
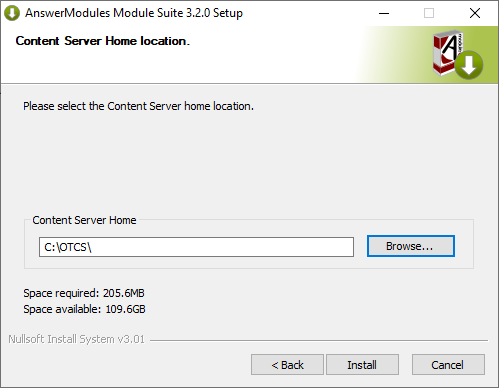
Confirm the installation path:
The installer will prompt you for the location where Content Server is installed. Browse to your OTCS_HOME and select “Next” when ready to start the installation.
-
Deployment (automatic step):
Automatic import of Content Server dependencies: The installer will automatically attempt to load a few libraries from Content Server.
In case of failure, a warning message could appear during this phase of the installation. In such case, the operation must be performed manually.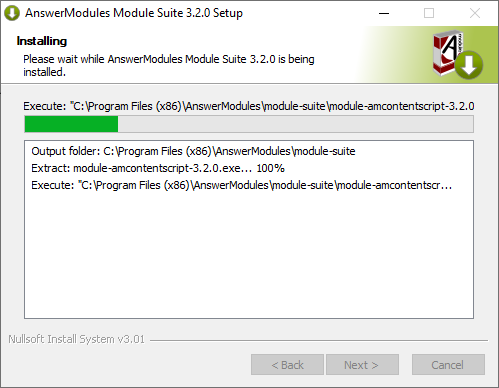
What to do if the installer raises the error: Unable to automatically extract...
Some Content Script extension packages require two Java libraries that are specific to the target Content Server environment and are not distributed with the module.
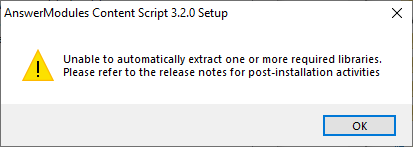
The required library files are:
- csapi.jar
- service-api-X.X.XX.jar
and can be found in the web app located in:
- %OTCS_HOME%\webservices\java\webapps\cws.war (on CS 16.X)
- %OTCS_HOME%\webservices\java\webapps\cws.war (on CS 10.5.X)
To retrieve the files:
- copy the file named XXX.war to a temporary folder
- rename the file XXX.war in XXX.zip .
- extract the zip archive contents locate the files in the WEB-INF/lib folder
Once the files have been located, copy them to the folder:
%OTCS_HOME\staging\anscontentscript_x_y_z\amlib
-
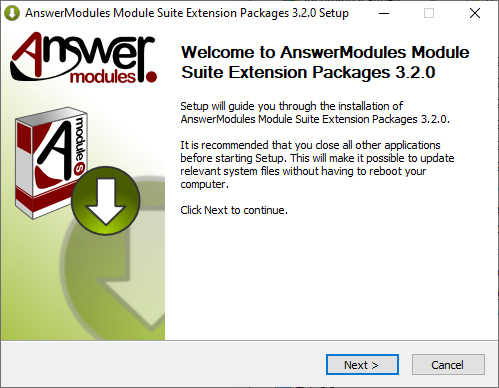
Start the extension packages installation:
Optional
This will only appear if the "Module Suite Extensions" option has been selected in the master installer.
Welcome Screen: Select “Next” when ready to start the installation.
-
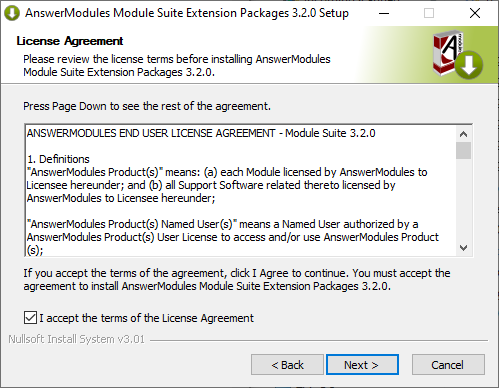
Accept the extensions supplemental EULA:
Optional
This will only appear if the "Module Suite Extensions" option has been selected in the master installer.
EULA Screen: Acceptance of the end-user license agreement is mandatory to proceed with the installation.
Accepted agreement
A copy of the EULA agreement will be available, upon installation, in:
%OTCS_HOME%/module/amcontentscript_X_Y_Z/license/EULA
Select “Next” when ready.
-
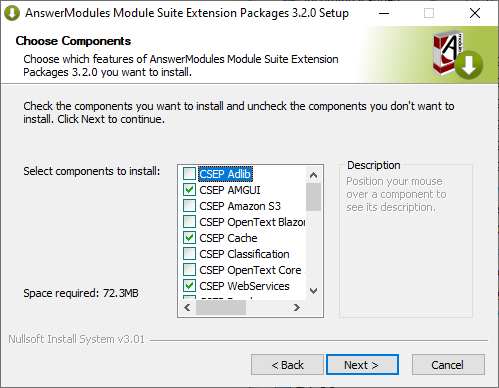
Select the extension packages to be installed:
Optional
This will only appear if the "Module Suite Extensions" option has been selected in the master installer.
Components selection: Select all of the extension components that are to be installed. Select “Install” when ready.
CSEP SAP
The Content Script Extension for SAP™ is a Content Script optional extension package that requires specific additional configuration steps.
It should not be deployed if you are not intending to complete the configuration, as an incomplete configuration could affect the Module Suite functionality.
This extension package requires the SAP™ JCo library to be available in the extension repository
<OTHOME>/module/anscontentscript_x_y_z/amlib/sapand is certified for use with SAP™ JCo version (3.0.6) when used on OpenText Extended ECM and version (3.0.10) when used on CSP. SAP™ JCo library can be downloaded from SAP™ website. -
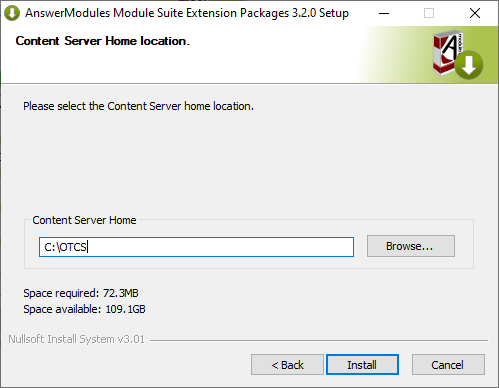
Confirm the installation path:
Optional
This will only appear if the "Module Suite Extensions" option has been selected in the master installer.
The installer will prompt you for the location where Content Server is installed. Browse to your OTCS_HOME and select “Next” when ready to start the installation.
-
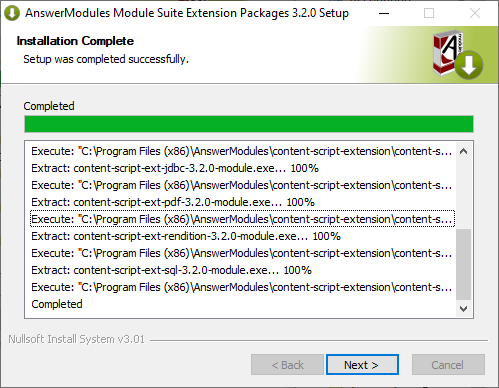
Deployment (automatic step):
Optional
This will only appear if the "Module Suite Extensions" option has been selected in the master installer.
Extension Package Installation: The extension packages are automatically installed. Select “Next” when the procedure is complete.
-
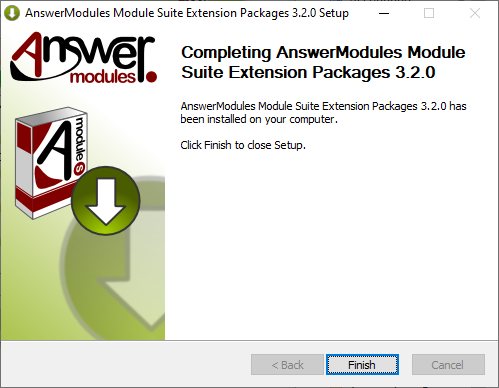
Deployment complete:
Optional
This will only appear if the "Module Suite Extensions" option has been selected in the master installer.
Extension Package Installation completed: Select “Finish” and return to the installation checklist to finalize the module setup.
-
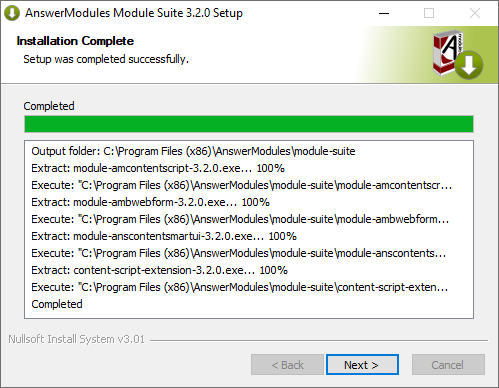
Master installer deployment (automatic step):
Module Suite Installation: Module Suite components installation is finalized. Select “Next” when the procedure is complete.
-
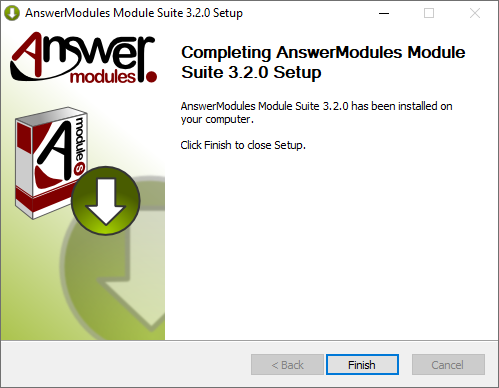
Deployment complete:
Module Suite Installation completed: Select “Finish” and return to the installation checklist to finalize the module setup.
-
At this point, the Modules have been deployed in the Content Server Staging folder and is available for installing it through the Content Server administration pages.
Next Steps
Please proceed to the Installation phase.