Script Console
Installation procedure (Windows)
Script Console can be configured to run in different modes. Common scenarios are:
- standalone interactive console, connected to OTCS: mainly used for batch processing and administration tasks
- standalone script interpreter, connected to OTCS: mainly used for scheduling administration tasks
- standalone lightweight webserver (based on embedded application server), connected or not connected to OTCS
- web application deployed on external application server, connected or not connected to OTCS
This guide covers the standard installation procedure of the Content Script Console (standalone based on embedded application server) which allows for modes 1, 2 and 3 of the above list.
For alternative deployment scenarios, including deployment on an external application server, please make reference to AnswerModules Support Team and guides available through Support Portal.
- Run the Script Console Installer and install the Script Console in your favourite location (this step should be executed by an user having local administrative privileges)
Environment variables
The Script Console installer will create for your convenience a couple of environment variables:
- AMSC_CONFIG: the Script Console's configuration root folder
- AMCS_RUNTIME: the Script Console's runtime root folder
Step-by-step procedure
The following screens will guide you through the Content Script Module Master Installer steps.
| Action to take | Installer's screen |
|---|---|
|
Select “Next” when ready to start the installation.
this is the initial step if using the Module installer directly |
Welcome
|
|
Acceptance of the end-user license agreement is mandatory. Upon installation, a copy of the agreement will be available in: license/EULA Accepting the End User Agreement is mandatory to proceed with the installation. Select “Next” when ready. |
EULA License Agreement
|
|
Licensing information for third-party software included in the release.
Upon installation, a copy of the notice will be available in:
license/THIRD-PARTY Accepting the End User Agreement is mandatory to proceed with the installation. Select “Next” when ready. |
Third Party Licenses 
|
|
Licensing information for extra third-party software included in the release.
Upon installation, a copy of the notice will be available in:
license/THIRD-PARTY-EXTRA Accepting the End User Agreement is mandatory to proceed with the installation. Select “Next” when ready. |
Additional Third Party Licenses 
|
|
Choose the location where the Script Console components will be installed. Runtime includes all binary and libraries. Example: C:\AnswerModules\ContentScriptConsole_1.7.0\Select “Next” when ready to proceed. |
Install location 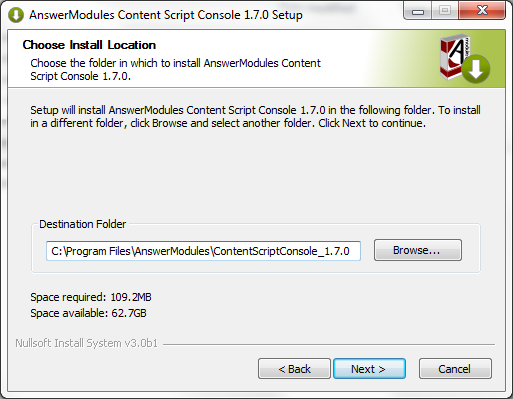
|
|
Pick the extension packages that will be included in your installation. There are two different types of extensions that can be installed:
|
Extension packages selection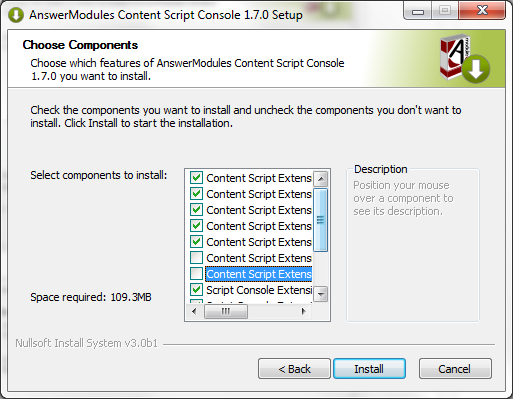
|
| Follow the installation steps for each component to be installed. |
Installing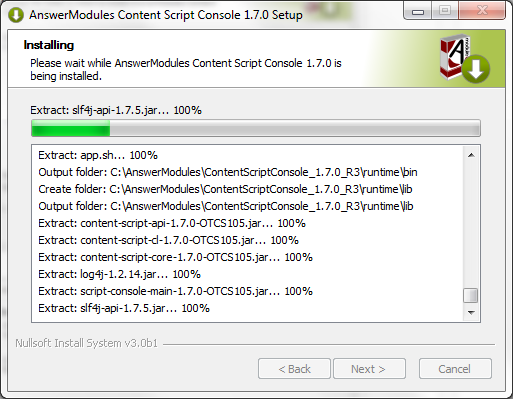
|
|
The unpacking of the module is complete. Select “Finish” and return to the installation checklist to finalize the module setup. |
Complete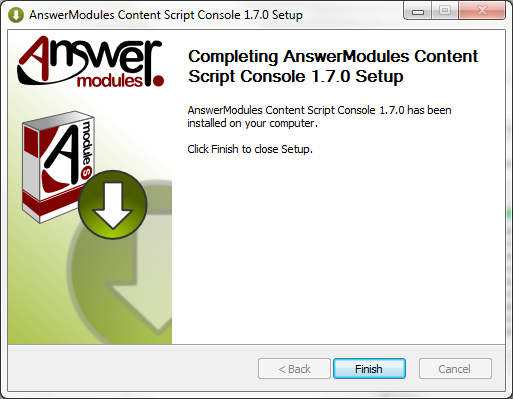
|
- Copy Content Server's libraries to the Script Console runtime
Some Content Script extension packages require additional Java libraries that are specific to the target Content Server environment, and are not distributed with the module. The required library files are:
- csapi.jar
- service-api-1X.X.XX.jar
- oml.jar
and can be found in the web app located in:
- %OTCS_HOME%\webservices\java\webapps\cws.war (on CS 16.X)
- %OTCS_HOME%\webservices\java\webapps\cws.war (on CS 10.5.X)
- %OTCS_HOME%\webservices\java\webapps\les-services.war (on CS 10.0)
- %OTCS_HOME%\ojlib (oml.jar)
To retrieve the files:
- copy the file named XXX.war to a temporary folder
- rename the file XXX.war in XXX.
- extract the zip archive contents locate the files in the WEB-INF/lib folder
Once the files have been located, copy them to the folder: %AMSC_RUNTIME%\amlib
- Perform basic configuration of the Script Console. The main configuration file is located in:
%AMSC_CONFIG%/config/cs-console-systemConfiguration.xml
Default configuration will be similar to the following:The base configuration allows to specify one or more “system” objects which represent OTCS instances to which the console will be able to connect.<?xml version="1.0" encoding="UTF-8" ?> <config> <systems> <system id="TEST"> <name>Content Server TEST Environment</name> <serverHost>localhost</serverHost> <serverPort>2099</serverPort> <local-repository-home>TEST</local-repository-home> <local-repository-encoding>UTF-8</local-repository-encoding> <otcs-repository-encoding>UTF-8</otcs-repository-encoding> <systemVars> <systemVar name="img">/</systemVar> <systemVar name="url"></systemVar <systemVar name="csModulePath"> </systemVars> <serviceVars> <serviceVar service="core" name="amcs.core.httpProxyHostname" ></serviceVar> <serviceVar service="core" name="amcs.core.httpProxyPort">80</serviceVar> <serviceVar service="core" name="amcs.core.httpProxyUsername"></serviceVar> <serviceVar service="core" name="amcs.core.httpProxyPassword"></serviceVar> <serviceVar service="core" name="amcs.core.httpMaxConnPerRoute">20</serviceVar> <serviceVar service="core" name="amcs.core.httpMaxConnTotal">50</serviceVar> <serviceVar service="core" name="amcs.core.httpOTCSSchema">http</serviceVar> <serviceVar service="core" name="amcs.core.tempFilePath">/tmp/</serviceVar> </serviceVars> <users></users> </system> </systems> </config>
How to setup your base configuration
The base configuration can be edited manually, or, alternatively, configuration parameters can be downloaded from a target Content Server instance. This feature comes particularly handy for installations that include multiple Content Script Extension Packages, each with its own configuration settings.
- Apply any available hotfix(es)
Hot to install an hotfix
Before you install any hotfix, please backup all essential files.
To install the hotfix, download the hotfix from the Support portal and save it to a temporary location.
Make sure Script Console services (or executable) are completely stopped. From the temporary location, extract the contents of the hotfix to the
The directory (directories) and file(s) contained in the hotfix(es) you install will be copied to
Please always make reference to the hotfix's description file:
Configure Script Console
To perform configuration against an OTCS instance, run the Script Console in shell mode. To do so, open a Windows Commands Processor and move to the folder: %AMSC_RUNTIME%/bin which includes the Script Console's executables
- Run the
app-windowsexecutable:
app-windows executable" src="../../images/media/image9.png" />
- The following prompt should appear:
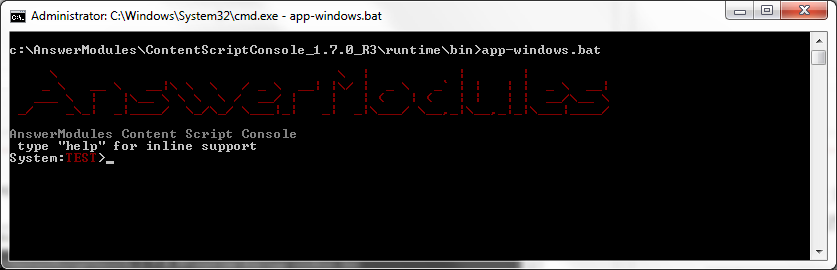
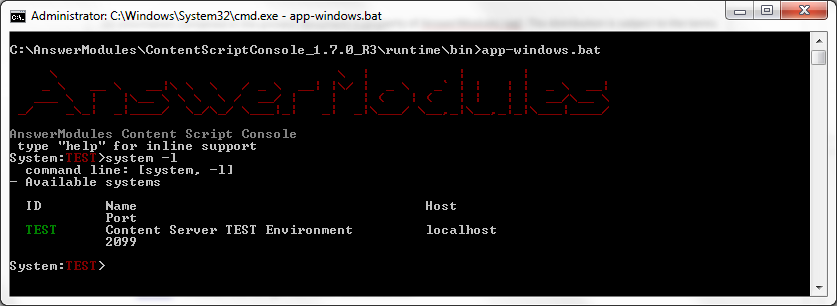
- The default TEST system is selected. To list all available systems, use the system command with the list flag (
-l, --list). E.g.system -l:
-
To create a new system (for example, LOCAL) use the system command with the add flag (
-a, --add) followed by the ID of the new system. E.g.system -a LOCALThe shell will prompt for the required base values, such as
hostnameandportnumber.
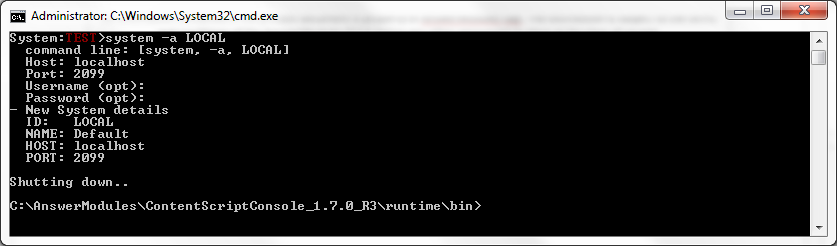
Upon creating a new system, the Script Console will require a restart and will automatically shutdown.
- Switch the active system to LOCAL using the system command with the system flag (
-s) followed by the ID of the target system. E.g.system -s LOCAL
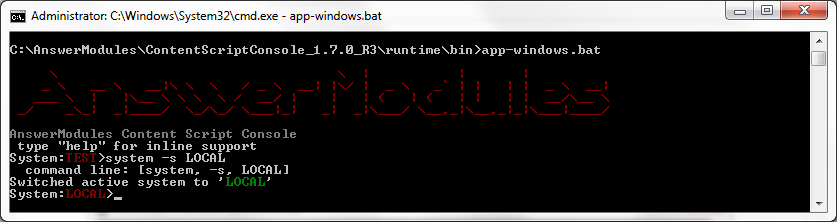 The active system indicator in the command prompt should now indicate LOCAL.
- Login to the LOCAL system using the
logincommand
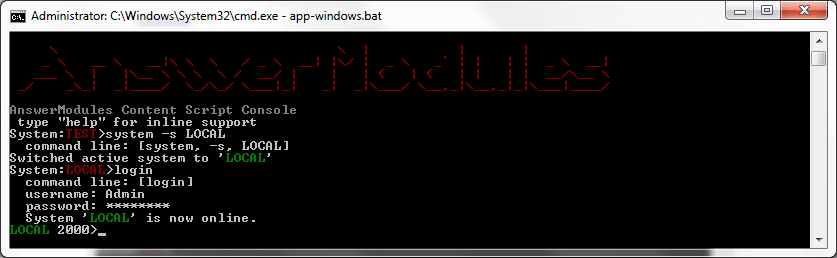 The active system indicator in the command prompt should now turn green to indicate that the system is ONLINE
-
Synchronize ModuleSuite configuration parameters from the LOCAL system using the loadConfig command with the mode flag (
-m, --mode) followed by the ALL value, and the verbose flag (-v, --verbose). E.g.loadConfig -m ALL -vThe LOCAL system base configuration will be transfered and stored in the Script Console configuration file -
The configuration is complete. Try a simple ls command to test the connection
