Beautiful WebForms
Installation procedure (Windows)
We will refer to the Content Server installation directory as %OTCS_HOME%
-
Deploy Content Server Modules
-
Run the Module Suite Master Installer and install the Beautiful WebForms module.
Step-by-step procedure
The following screens will guide you through the deployment of Beautiful WebForms Module.
| Action to take | Installer's screen |
|---|---|
| Select “Next” when ready to start the installation. |
Welcome Screen 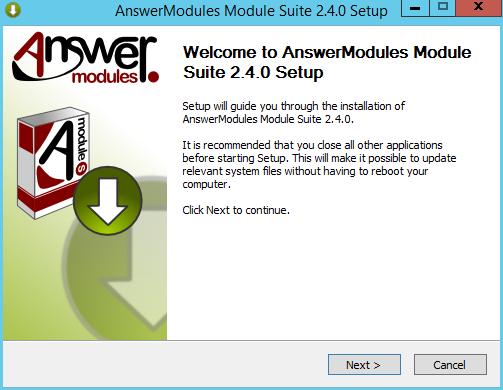
|
|
Acceptance of the end-user license agreement is mandatory. Upon installation, a copy of the agreement will be available in: %OTCS\_HOME%/module/ amcontentscript\_X\_Y\_Z/ license/EULA Accepting the End User Agreement is mandatory to proceed with the installation. Select “Next” when ready. |
EULA License Agreement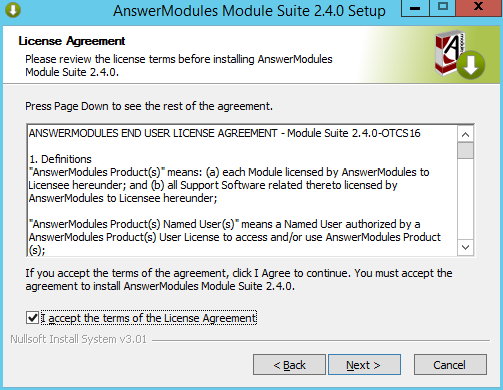
|
|
Script console is unselected by default because it is not a Content Server module. A standard Module Suite installation does not require this component to be installed.
More information regarding Script Console can be found here |
Components selection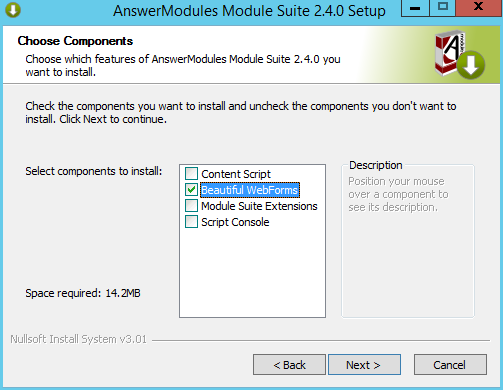
|
| The installer will prompt you for the location where Content Server is installed. Browse to your OTCS_HOME and select “Next” when ready to start the installation. |
Installing
|
| Follow the installation steps for each component to be installed. |
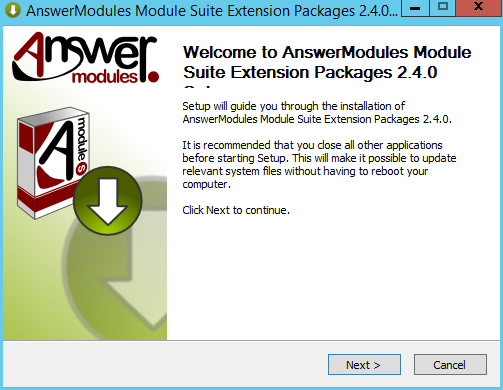
Welcome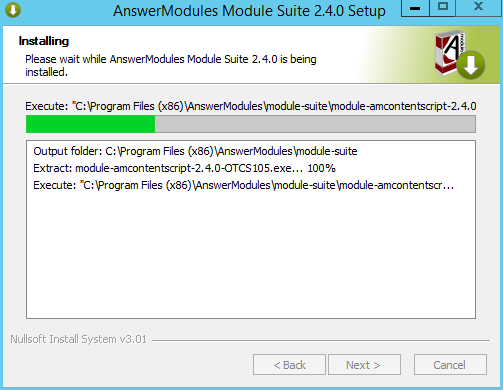
|
|
The installer will automatically attempt to load a few libraries from Content Server. |
Automatic import of Content Server dependencies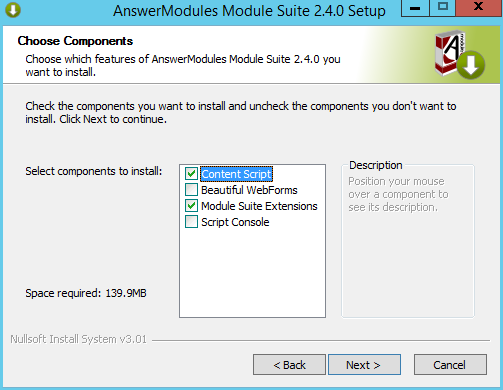
|
|
Module Suite Extension Packages Select “Next” when ready. |
|
|
Acceptance of the end-user license agreement is mandatory. Upon installation, a copy of the agreement will be available in: %OTCS\_HOME%/module/ amcontentscript\_X\_Y\_Z/ license/EULA Accepting the End User Agreement is mandatory to proceed with the installation. Select “Next” when ready. |
EULA License Agreement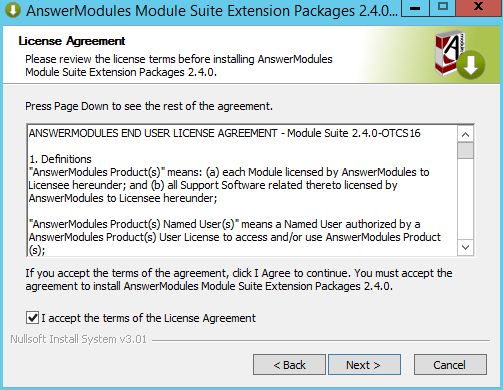
|
|
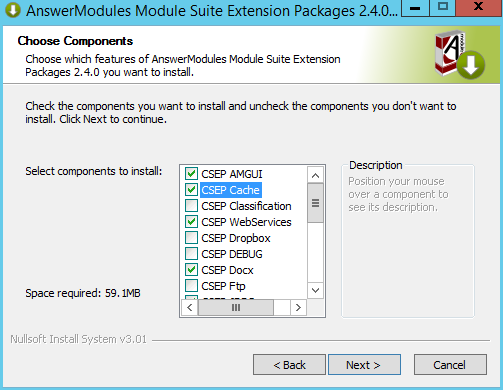
Select all of the extension components that are to be installed Select “Install” when ready.
Installation of the following extensions packages:
require additional configurations not covered by this guide. Deselect the corresponding checkboxes upon the installation or contact the AnswerModules support for assistance. |
|
| The installer will prompt you for the location where Content Server is installed. Browse to your OTCS_HOME and select “Next” when ready to start the installation. |
Installing
|
|
The unpacking of the module is complete. Select “Finish” and return to the installation checklist to finalize the module setup. |
Complete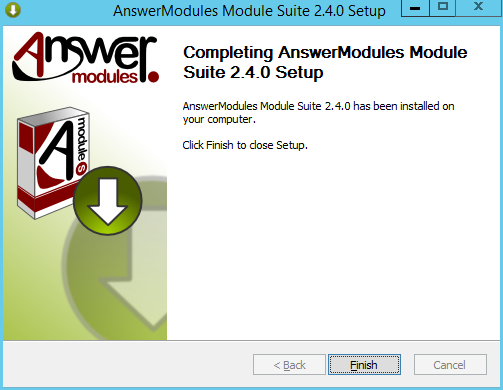
|
-
Install Content Server Modules
-
Login as Administrator and access the Module administration panel
-
Select “Install Modules”
-
From the available modules, select “Answer Modules - Beautiful Web Forms 2.4.0”
-
Follow the installation steps and stop Content Server when prompted.
If an earlier version of Content Script module was installed, and you are performing an upgrade, it is mandatory once the upgrade is completed to check for the presence of the previous module version in %OTCS_HOME%/module. In the eventuality, the previous version of the module has not been removed automatically, stop Content Server service and remove it manually. The Content Server will fail to start if two versions of the Content Script module are present at the same time.
- From the Administration Home, select AnswerModules Administration > Base Configuration, then enter the activation License in order to activate the product. License shall be entered in the amcs.core.license property
Since version 1.7.0, if the installation is performed on a multi-server architecture, the License Key must be made available on every single machine. License Key information is stored in the Content Script module anscontentscript.ini file.
In order to do so, there are two alternative options:
- Edit the .ini file manually on each machine, adding the licensing information.
- From the Administrative pages of each machine, perform the “save Base Configuration” operation.
- Save the Base Configuration and restart Content Server
Installation complete
The Beautiful WebForms initial setup is complete