Extension: Mobile WebForms
What is it?
AnswerModules’ Mobile WebForms is both: - An add-on solution for CSP/xECM. - A functional extension for Module Suite (AnswerModules’ core solution).
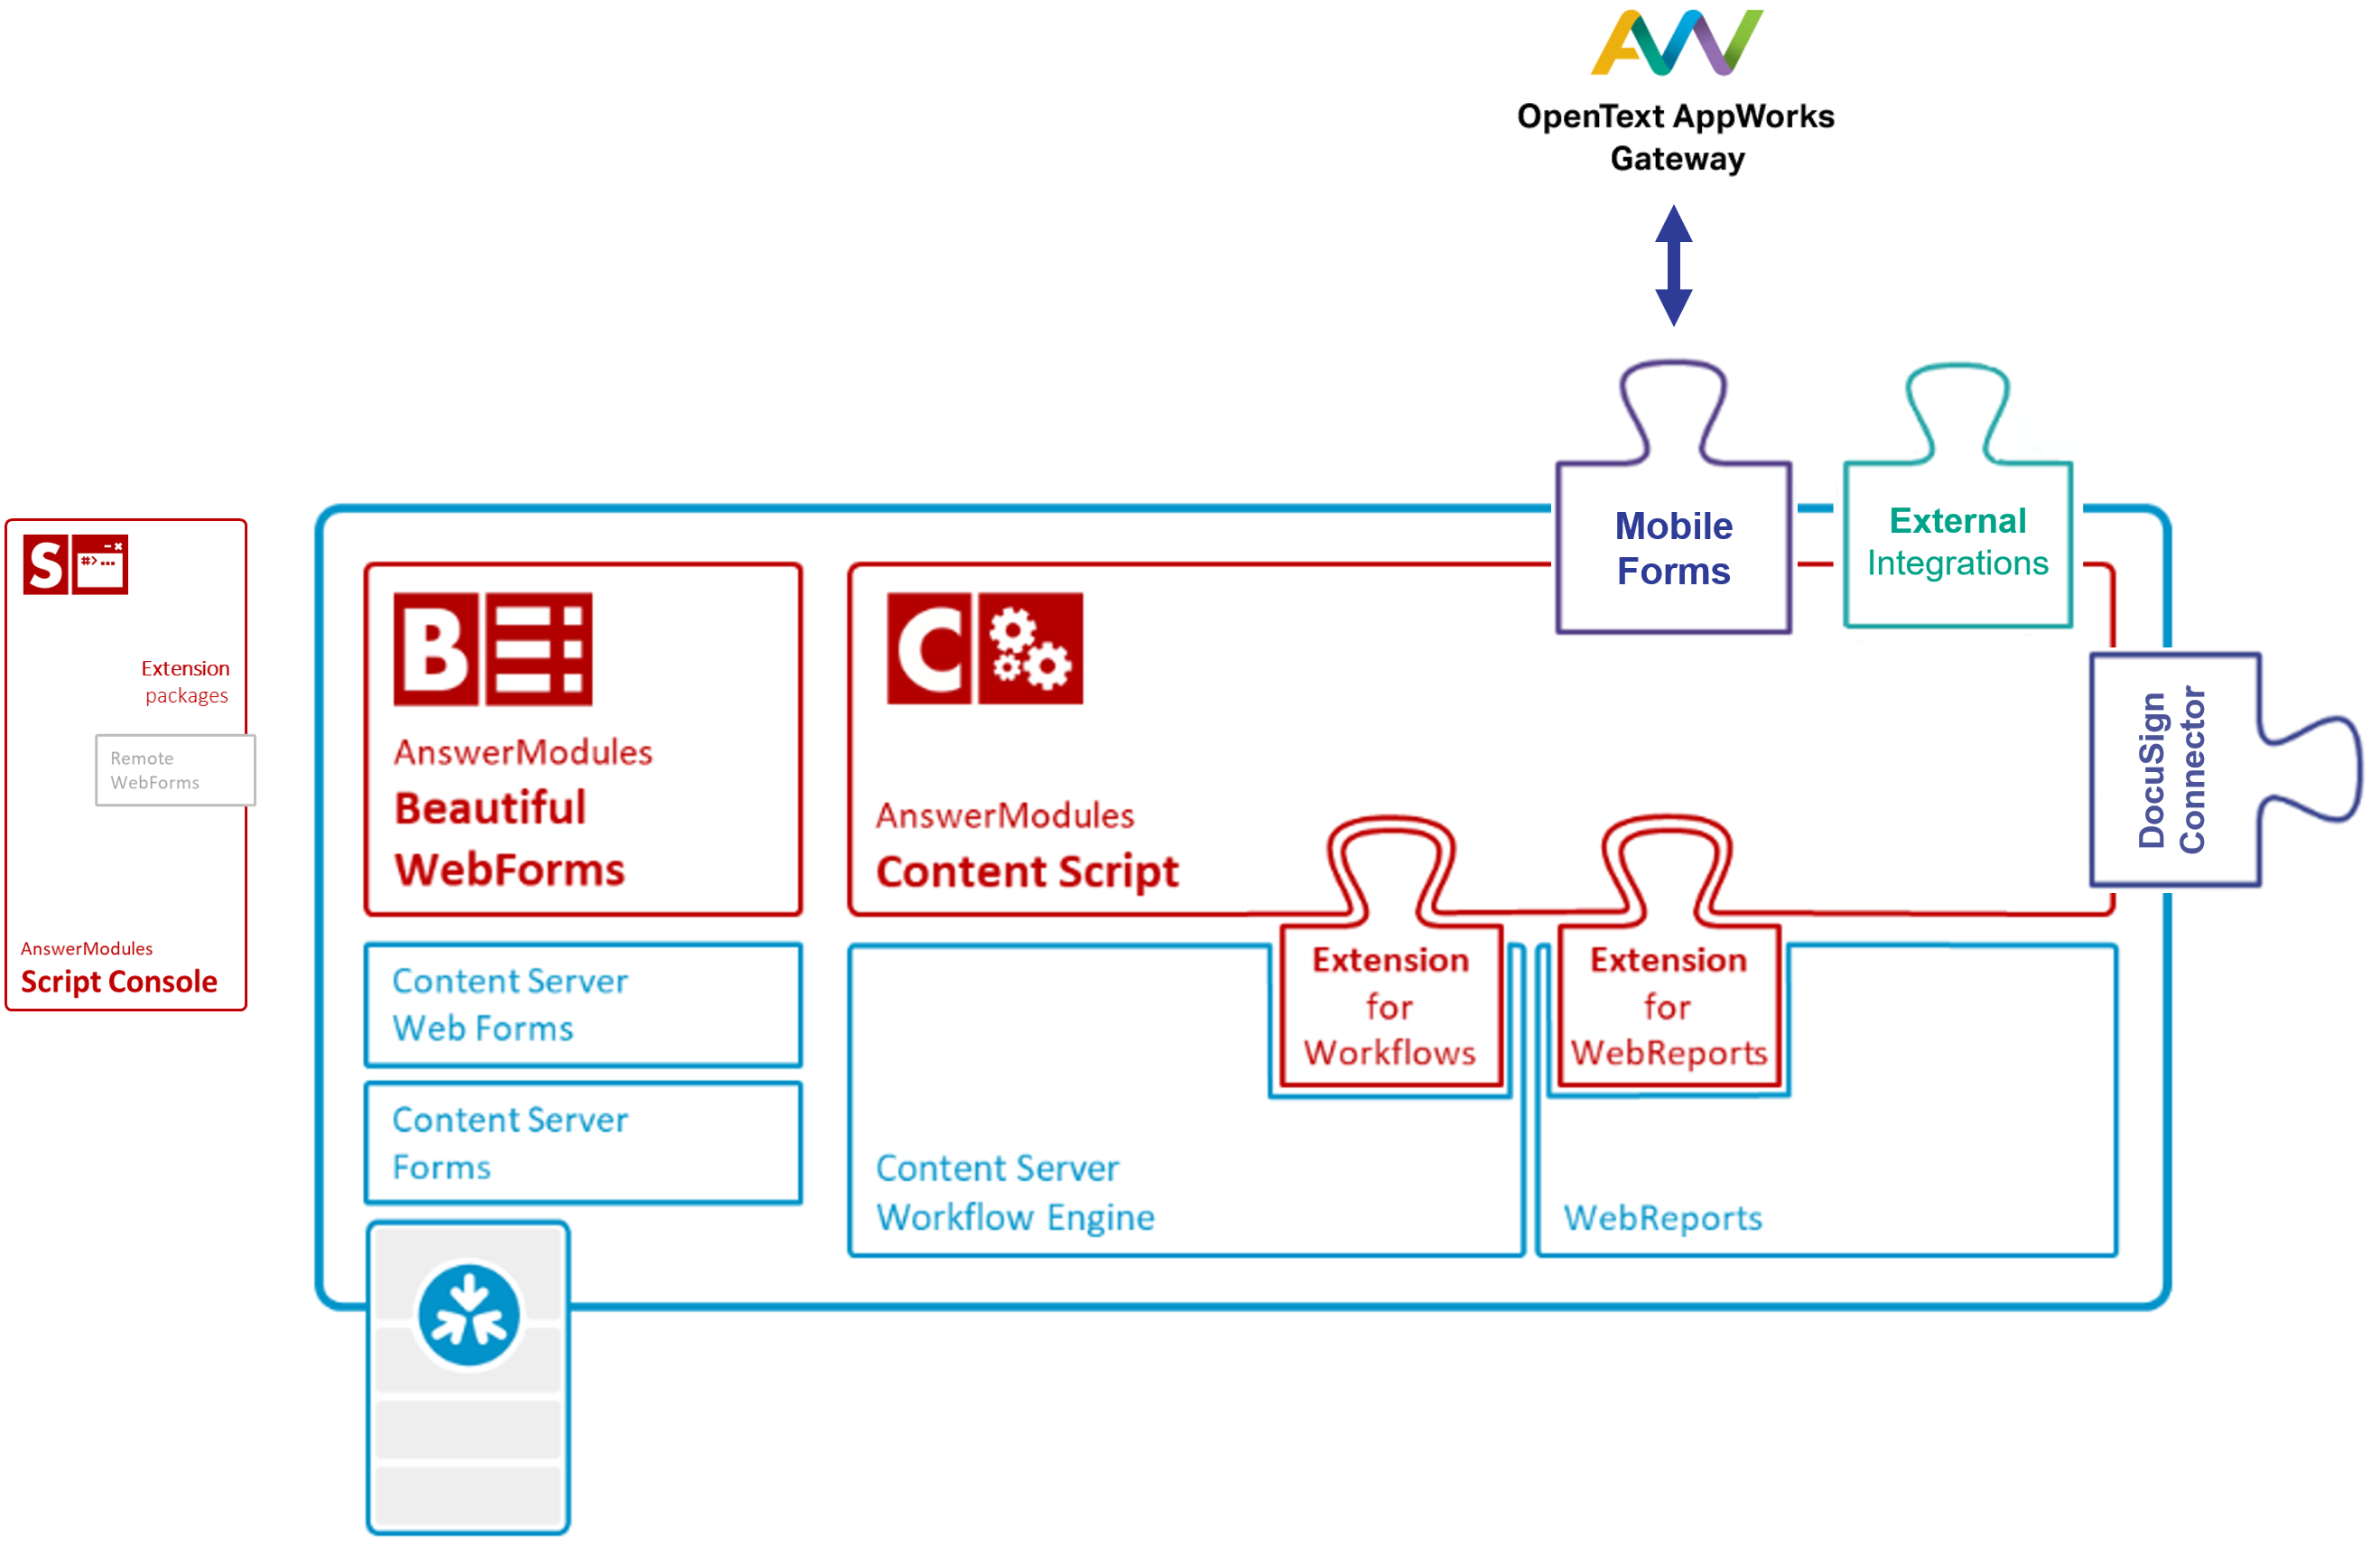
AnswerModules’ Mobile WebForms consists of three macro components:
AppWorks Mobile Application
Every Mobile WebForms is transformed into an AppWorks application so that it can be it distributed to end-users’ devices through the AppWorks Gateway. This approach guarantees a very high degree of flexibility in terms of controlling access to the mobile form as well as governing the mobile form’s data security. By leveraging the AppWorks technology, a mobile form’s lifecycle can be fully managed (versioning, fine-grain user distribution, etc..), support for specific devices may be pre-defined and if necessary saved data could be remotely deleted from a specific device.
Module Suite based extension for REST APIs
By extending the CSP/xECM REST APIs a dedicated endpoint for Mobile WebForms has been created. The endpoint can be easily extended or adapted in order to effectively open a potentially infinite number of use cases when it comes to how form data is utilized and persisted once its synchronized onto CSP/xECM. Some possible scenarios for how the form data can be utilized include: starting or updating a workflow, creating Connected Workspaces programmatically, generating documents (PDF, Word, Excel, etc…), transmitting the data to another system (i.e.: CRM, ERP, etc…), and much more.
Mobile WebForms Application Builder
This component allows to create new AppWorks applications in a matter of minutes starting from an existing form. An intuitive wizard-like tool guides users in defining all the necessary elements to transform a simple WebForm into a Mobile WebForms. A preview of the process can be viewed at: https://youtu.be/xiBjPMAH-HU
Mobile WebForms setup
Installing the Mobile WebForms application on your system is a straightforward procedure made of a few simple steps.
As administrator
The installation procedure must be performed using a user with administrative rights on the system (for example, the administrator user)
- Download the Mobile WebForms Installation Package. (You can download it from here)
- Extract the contents of the zip file to a temporary location.
- Copy the contents of the Mobile Components.zip in the <Content_Server_home> directory and then restart the Content Server services.
- Logon to the OpenText Content Server with an administrative account.
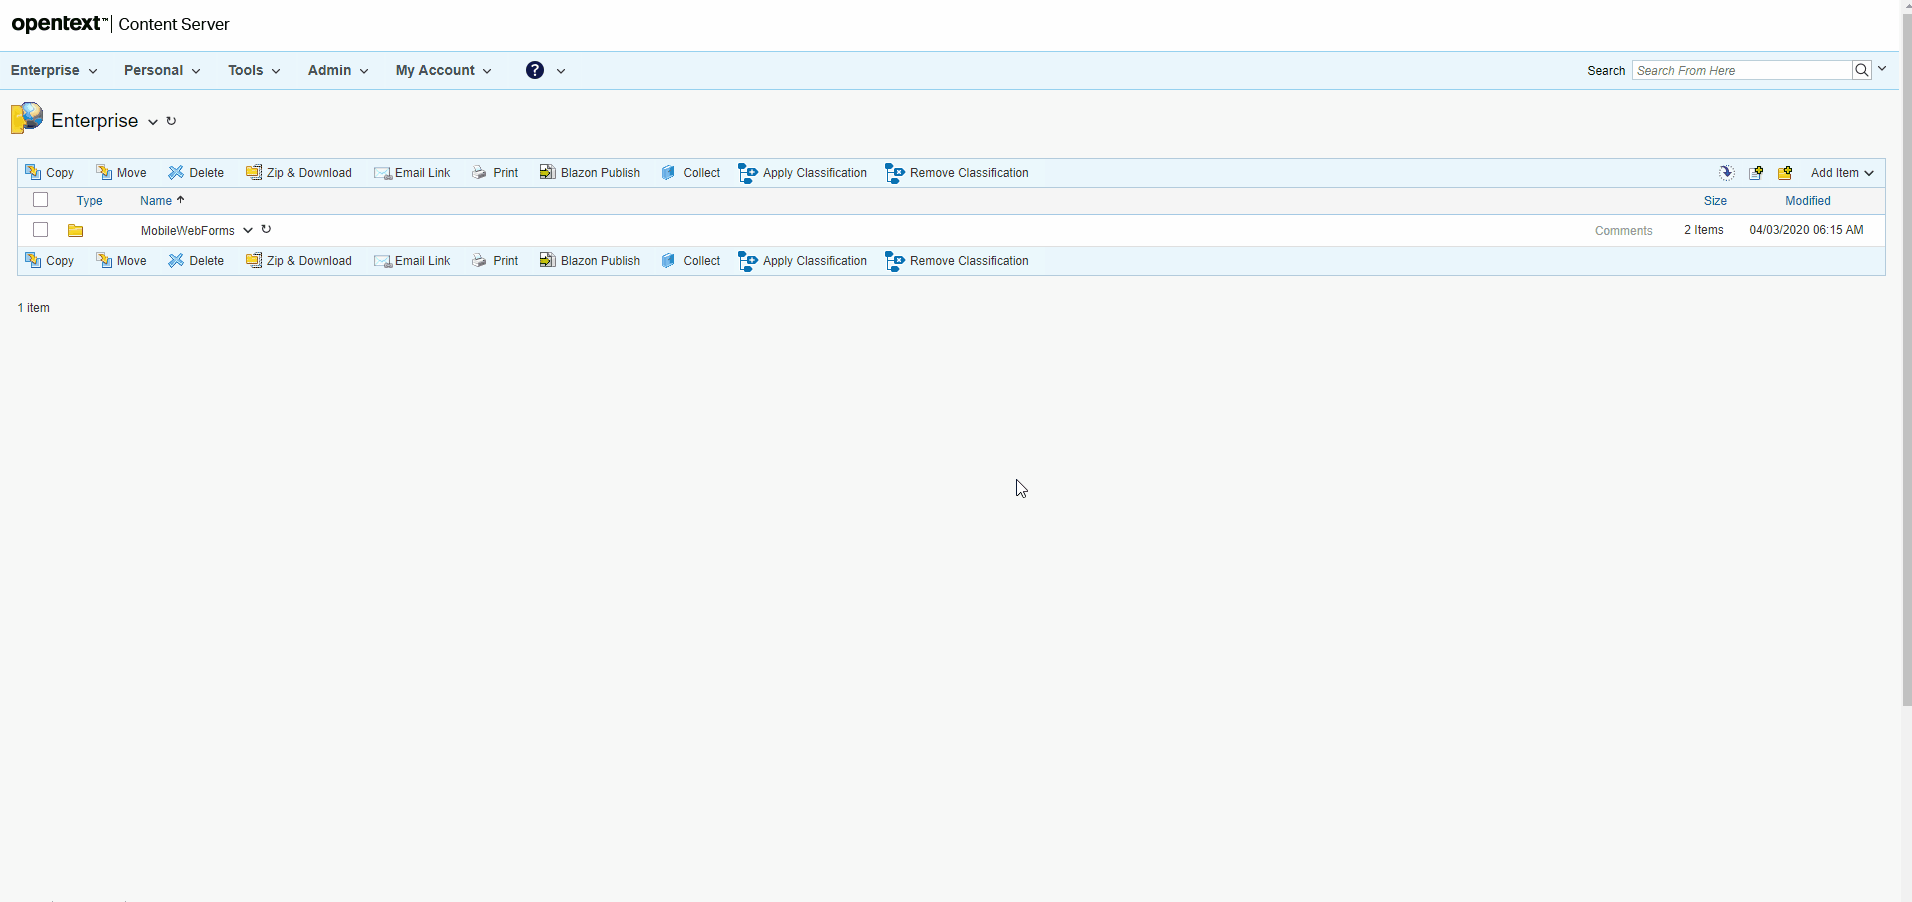
- Create a folder that will contain the installation package.
- Upload the mobileWebFormsXML.xml file, in the previously created folder.
- Create a Content Script in the same location for importing the package in the system. (please refer to the snippet below as a reference).
    def source    = docman.getNodeByName(self.parent, "mobileWebFormsXML.xml")
    def xmlFolder = docman.getNodeByName(self.parent, "Mobile WebForms")
    if(!xmlFolder){
        xmlFolder = admin.importXml(self.parent, source.content.content)
    }
    redirect "${url}/open/${docman.getNodeByName(xmlFolder, 'Install').ID}?scriptInstall=${self.ID}"
Pre-requisites
During the setup process the installer, will check if all the prerequisites are met. If the setup process notifies the need of a missing extension package, install the package before continuing.
To install an extension package you can refer to the following guide: http://developer.answermodules.com/manuals/current/installation/extpacks/
In the case the requested extension is the AnswerModules' Cache Extension Package then after the installation some additional configuration will be needed.
To properly configure the AnswerModules’ Cache Extension Package refer to the below guide:
https://support.answermodules.com/portal/kb/articles/content-script-extension-cache
Using the tool
A Mobile WebForms application is composed of three main elements:
- A form for inserting the information.
- An end-point Content Script that will implement the logics to properly manage the data upon synchronization from the OpenText AppWorks Gateway application.
- An OpenText AppWorks Gateway application for distributing the application to the end users.
Creating the form
The first step is the creation of the form that will be utilized to gather information from the end users.
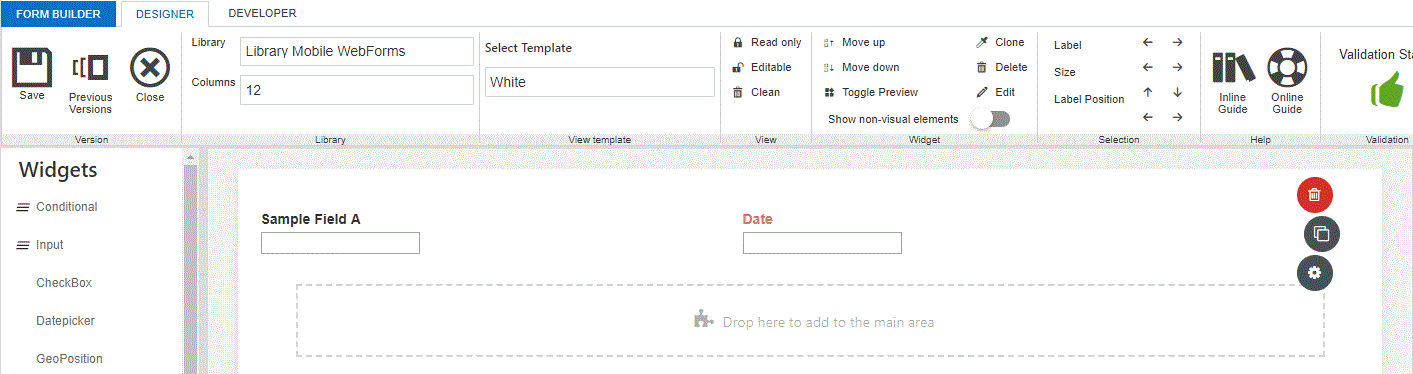
When editing the form's view with the Form Builder the widget library must be set to "Library Mobile WebForms". As for the template to use there are two options under the "Library Mobile WebForms" section:
- Dev: this template offers the possibility to verify the look & feel of the form without the need to deploy it on the OpenText AppWorks Gateway. This template should be only utilized during the development phase or for debugging purposes.
- White: this is template to be utilized when the application is ready to be deployed on the OpenText AppWorks Gateway.

When editing a form's view with the Form Builder, the form's view will be pre-populated with the widgets representing the elements inserted in the Form Template. A Mobile WebForms will need to be designed using specific widgets coming from the Mobile WebForms Library, to do so delete the self created widgets derived from the form template, verify that the Library Mobile WebForms is selected, save the form's view and refresh the page. Once the page has refreshed drag&drop the widgets from the left-hand side of the Form Builder to the form's view.
Implementing the Content Script end-point
When synchronizing the information back to Content Server, the Mobile WebForms application will make a call to a Content Script.
For a detailed explanation on using AnswerModules' Content Scripts please refer to the following guide: http://developer.answermodules.com/manuals/current/working/contentscript/otcsobj/
The Content Script must reside inside the CSServices folder within the Content Script Volume. The script must contain all the business logic needed to properly manage the information that is being synchronized from the OpenText Gateway application. The installation process will create a default end-point called "mobileWebForms" please refer to it as a reference implementation.
Building the OpenText AppWorks Gateway Application
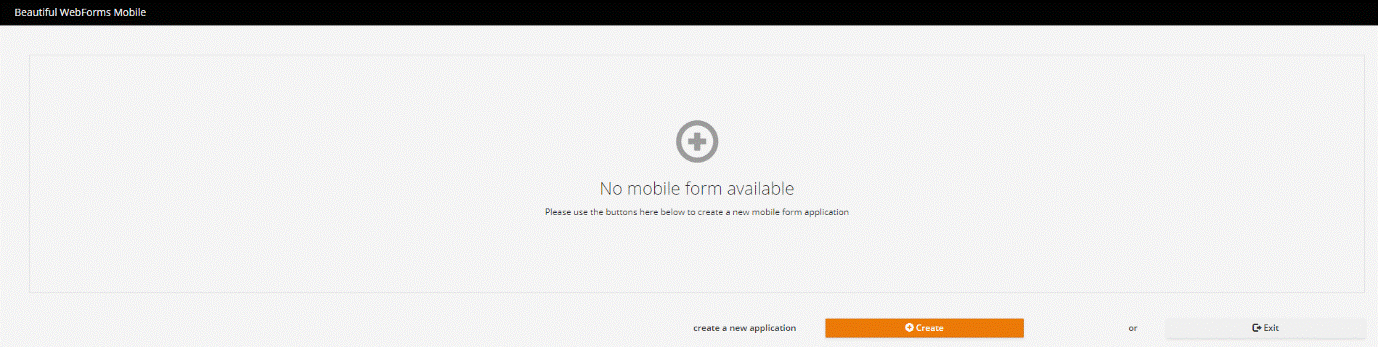
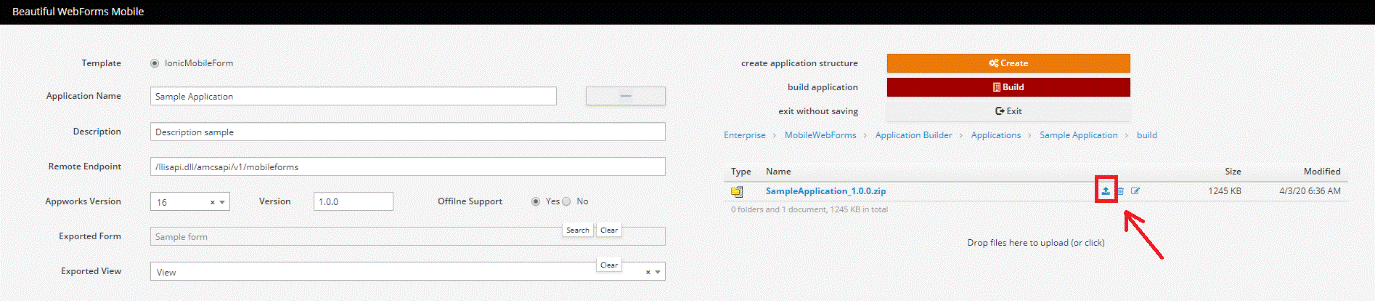
To deploy the application on the OpenText AppWorks Gateway it will be necessary to prepare a deployable package compliant with the OpenText AppWorks Gateway. The preparation of the up-said package can be done via the Mobile WebForms application by opening the form “Registered Applications”. The form can be found under Enterprise\MobileWebForms\Application Builder\Builder
Once opened, the form will show the list of registered application. New applications can be created by clicking on the "Create" button at the bottom of the page.
Clicking on the “Create” button will prompt the user for the application's details.
-
Application name
-
An icon for the application (to be shown as the application's icon on the mobile device)
-
A description (to be set as the application's description on the mobile device)
-
The remote end-point script name (called when synchronizing the form's data)
-
The Appworks Gateway version
-
The application’s version (When updating the application the version number must be increased)
-
The related form
-
The specific view to be used
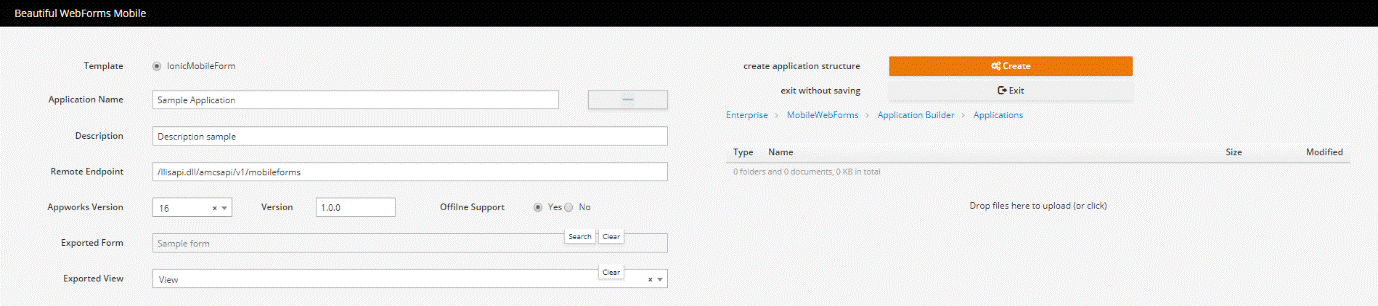
Clicking the “Create” button will automatically create an appropriate folder structure containing all the application's required objects
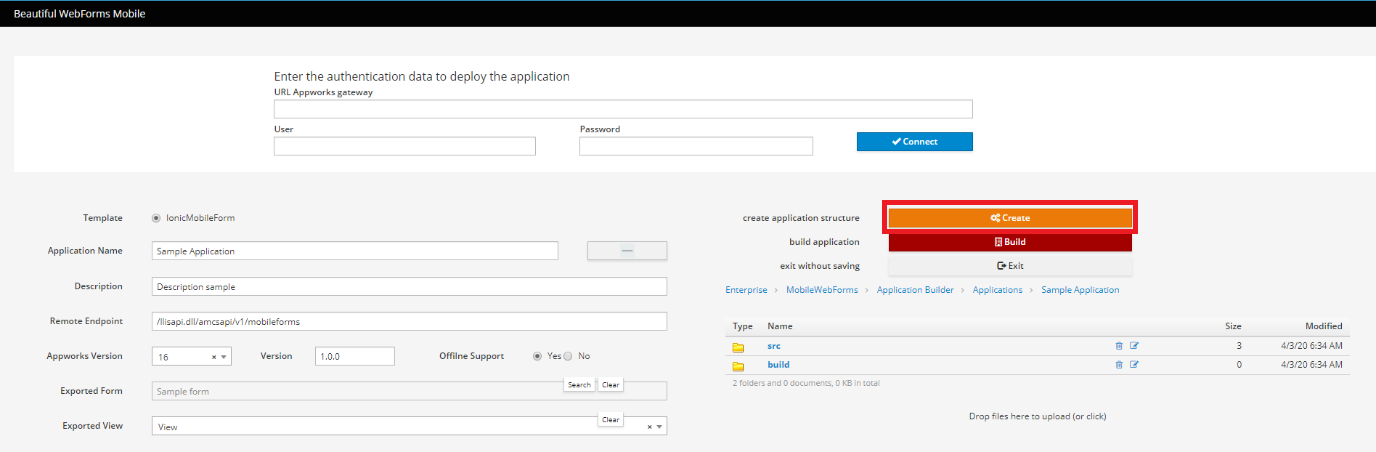
Once the application's structure has been created it will be possible to create an OpenText AppWorks Gateway deployable package by clicking on the "Build" button.
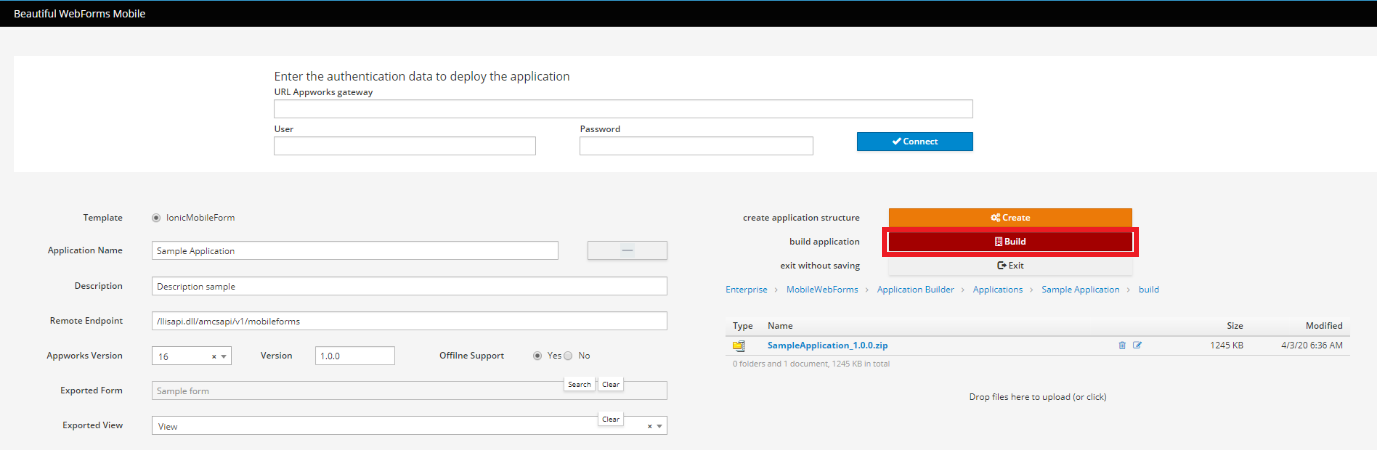
To upload the application to the OpenText AppWorks Gateway, enter the path and the authentication credentials of the destination OpenText AppWorks Gateway and click "connect".

Once connected to the OpenText AppWorks Gateway, the system will enable the user to deploy the application. Clicking on the deploy icon will automatically upload, install and enable the application on the OpenTextAppWorks Gateway.
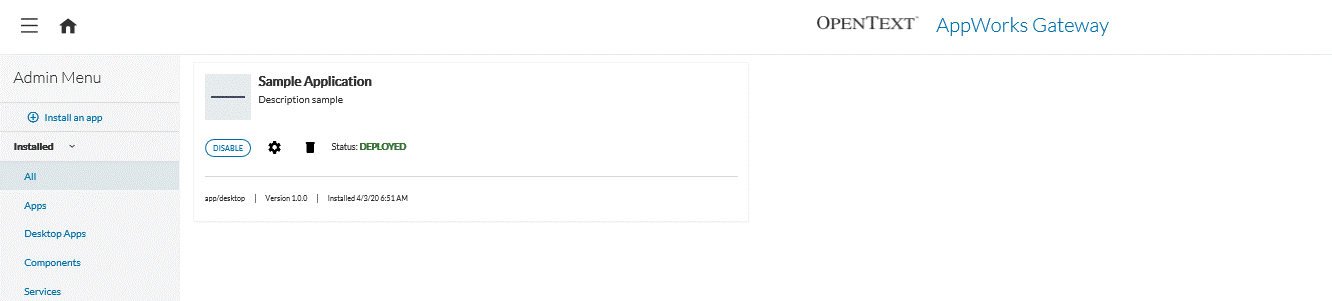
To verify the correctness of the process access the OpenText AppWorks Gateway and verify that in the "Installed" section the application to be distributed is present and enabled.
OpenText AppWorks Gateway
No information will be provided for installing and properly configuring the OpenText AppWorks Gateway. For installing ad configuring the OpenText AppWorks Gateway please refer to the official OpenText documentation.
The complete tour: