Content Script
Installation procedure (Windows)
We will refer to the Content Server installation directory as %OTCS_HOME%
-
Stop the Content Server
-
Run the Module Suite Content Script Master Installer and install the Content Script module
The following screens will guide you through the Content Script Module
Master Installer steps.Step-by-step procedure
| Action to take | Installer's screen |
|---|---|
| Select “Next” when ready to start the installation. |
Welcome Screen 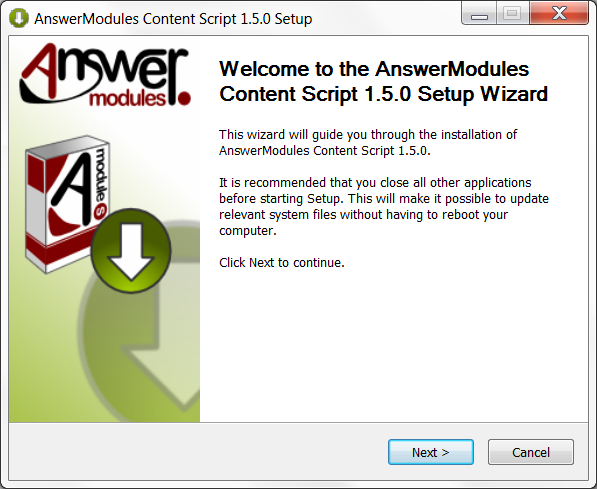
|
|
Acceptance of the end-user license agreement is mandatory. Upon installation, a copy of the agreement will be available in: %OTCS\_HOME%/module/ amcontentscript\_X\_Y\_Z/ license/EULA Accepting the End User Agreement is mandatory to proceed with the installation. Select “Next” when ready. |
EULA License Agreement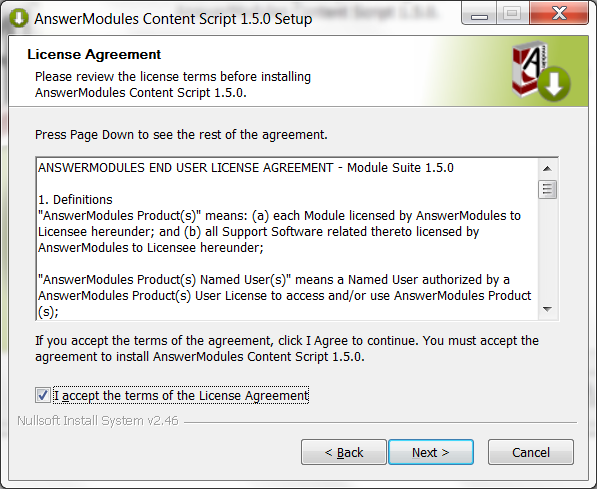
|
|
Unselect all of the components excepting OTCS Module: extension packages will be installed later, if necessary. Select “Install” when ready. When using the Master Installer, do not attempt to install the Content Script Extension packages at the same time of the Content Script Module. Extension Packages can only be installed when the setup of the base Content Script Module has been completed. |
Components selection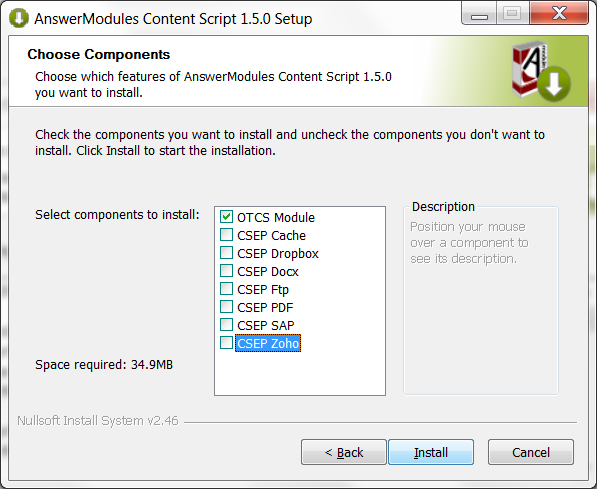
|
| Follow the installation steps for each component to be installed. |
Installing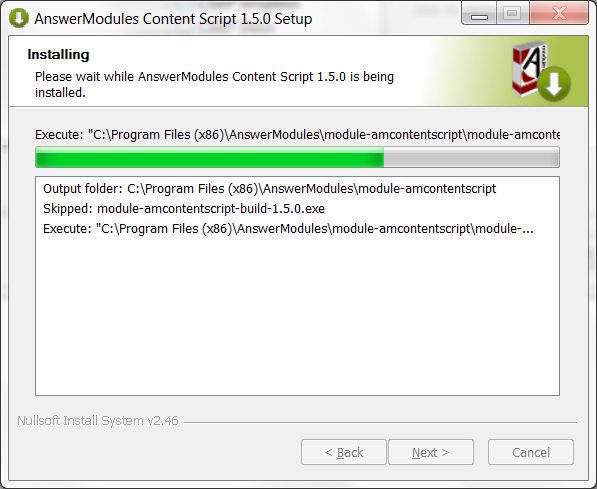
|
|
Select “Next” when ready to start the installation.
this is the initial step if using the Module installer directly |
Welcome
|
|
Acceptance of the end-user license agreement is mandatory. Upon installation, a copy of the agreement will be available in: %OTCS\_HOME%/module/ amcontentscript\_X\_Y\_Z/ license/EULA Accepting the End User Agreement is mandatory to proceed with the installation. Select “Next” when ready. |
EULA License Agreement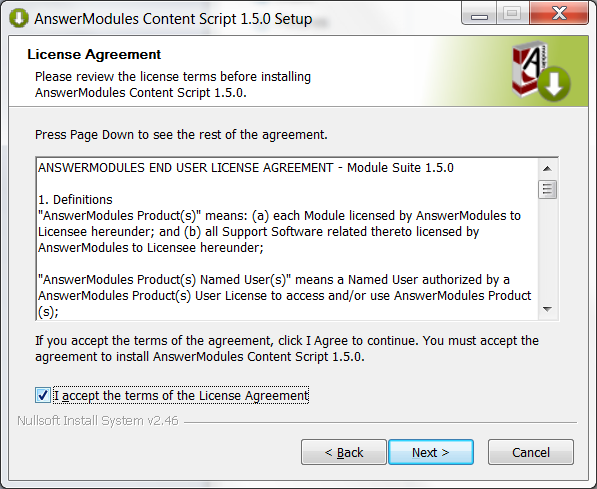
|
|
Licensing information for third-party software included in the release.
Upon installation, a copy of the notice will be available in:
%OTCS\_HOME%/module/ amcontentscript\_X\_Y\_Z/ license/THIRD-PARTY Accepting the End User Agreement is mandatory to proceed with the installation. Select “Next” when ready. |
Third Party Licenses 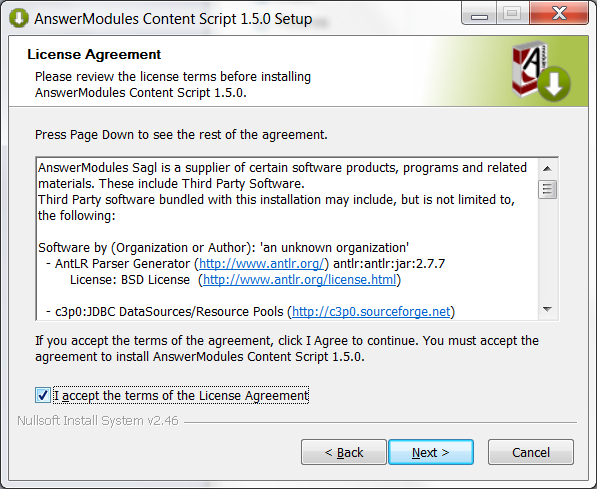
|
|
Licensing information for extra third-party software included in the release.
Upon installation, a copy of the notice will be available in:
%OTCS\_HOME%/module/ amcontentscript\_X\_Y\_Z/ license/THIRD-PARTY-EXTRA Accepting the End User Agreement is mandatory to proceed with the installation. Select “Next” when ready. |
Additional Third Party Licenses 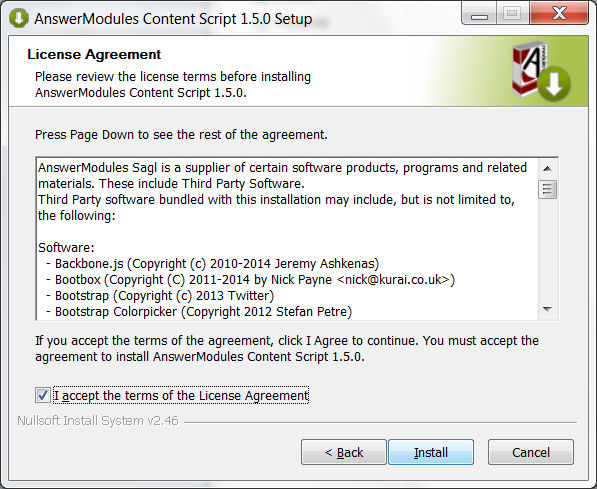
|
|
The module content is unpacked to:
%OTCS\_HOME%/staging Select “Next” when the procedure is complete. |
Installation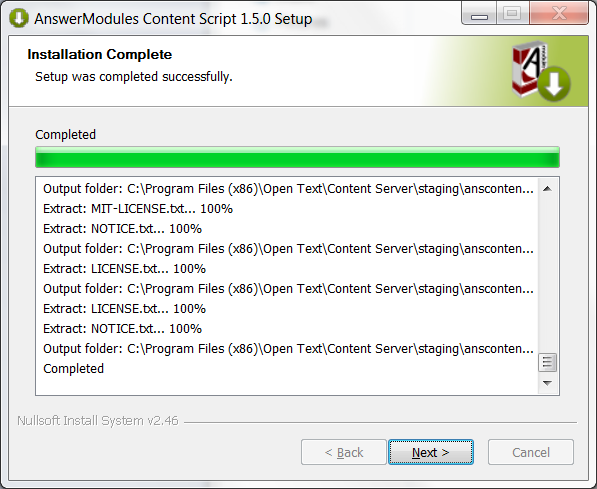
|
|
The installer will automatically attempt to load a few libraries from Content Server. |
Automatic import of Content Server dependencies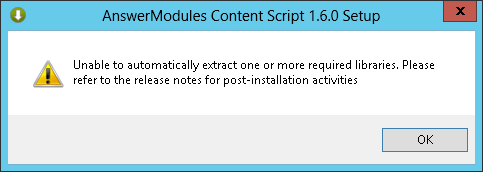
|
|
The unpacking of the module is complete. Select “Finish” and return to the installation checklist to finalize the module setup. |
Complete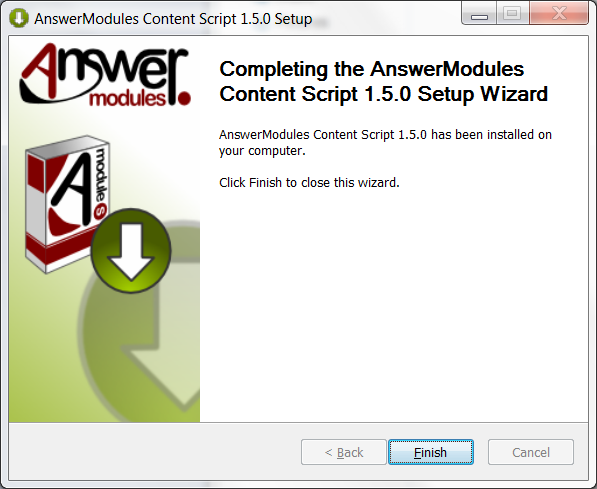
|
-
Start Content Server
-
Login as Administrator and access the Module administration panel
-
Select “Install Modules”
-
From the available modules, select “Content Script X.Y.0”
-
Follow the installation steps and stop Content Server when prompted.
If an earlier version of Content Script module was installed, and you are performing an upgrade, it is mandatory once the upgrade is completed to check for the presence of the previous module version in %OTCS_HOME%/module. In the eventuality, the previous version of the module has not been removed automatically, stop Content Server service and remove it manually. The Content Server will fail to start if two versions of the Content Script module are present at the same time.
Some Content Script extension packages require two Java libraries that are specific to the target Content Server environment and are not distributed with the module.What to do if the installer raises the error: "Unable to automatically extract..."
The required library files are:
- csapi.jar
- service-api-10.X.XX.jar
and can be found in the web app located in:
- %OTCS_HOME%\webservices\java\webapps\cws.war (on CS 16.X)
- %OTCS_HOME%\webservices\java\webapps\cws.war (on CS 10.5.X)
- %OTCS_HOME%\webservices\java\webapps\les-services.war (on CS 10.0)
To retrieve the files:
- copy the file named XXX.war to a temporary folder
- rename the file XXX.war in XXX.
- extract the zip archive contents locate the files in the WEB-INF/lib folder
Once the files have been located, copy them to the folder:
%OTCS_HOME\staging\anscontentscript_x_y_z\amlib
-
Post installation checks:
Verify that the following optimization for the Java Server JVM has been added in opentext.ini
Up to version 10.5 if the embedded JVM is JRE 1.7 :
1
2
3
4
5
6
7
8
JavaVMOption\_4=-XX:MaxPermSize=256m
JavaVMOption\_5=-Xmx2048m
JavaVMOption\_6=-Xms128m
JavaVMOption\_7=-XX:PermSize=256m
JavaVMOption\_8=-XX:+CMSClassUnloadingEnabled
JavaVMOption\_9=-XX:+UseConcMarkSweepGC
JavaVMOption\_10=-Dfile.encoding=UTF-8
JavaVMOption\_11=-Dlog4j.ignoreTCL=true
Since version 16 or with version 10.5 if you upgraded the embedded JVM to JRE 1.8:
1
2
3
4
5
6
JavaVMOption\_4=-Xmx2048m
JavaVMOption\_5=-Xms128m
JavaVMOption\_6=-XX:+CMSClassUnloadingEnabled
JavaVMOption\_7=-XX:+UseConcMarkSweepGC
JavaVMOption\_8=-Dfile.encoding=UTF-8
JavaVMOption\_9=-Dlog4j.ignoreTCL=true
-
Start Content Server